Table of contents
- Overview:
- Step 1: Set Up Your Number Pool in Dialics
- Step 2: Install the Dialics JavaScript/PHP Snippet on Your Landing Page
- Step 3: Integrate Google Ads with Dialics
- Step 4: Set Up Click Conversion Tracking
- Step 5: Adding Tracking Templates to Google Ads
- Step 6: Assign the Traffic Source and Conversion to a Tracking Number
- Step 7: Monitor and Optimize Your Campaigns
How to setup conversions for Visitor Level Tracking
Updated 19 months ago
Overview:
Visitor-level tracking allows you to capture detailed insights into which specific ad clicks lead to phone calls. By assigning unique dynamic numbers to each visitor and tracking their interactions, you can optimize your campaigns more effectively.
Requirements:
Before you begin, ensure the following are set up:
- JavaScript Snippet: Install the Dialics JavaScript or PHP snippet on your website or landing page.
- Number Pool Setup: Create a number pool and assign it to a tracking number in Dialics.
- Google Ads Auto-Tagging: Ensure auto-tagging is enabled in your Google Ads account.
Step 1: Set Up Your Number Pool in Dialics
- Create a Number Pool:
- Log in to your Dialics account.
- Navigate to the "Number Pools" section and create a new number pool.
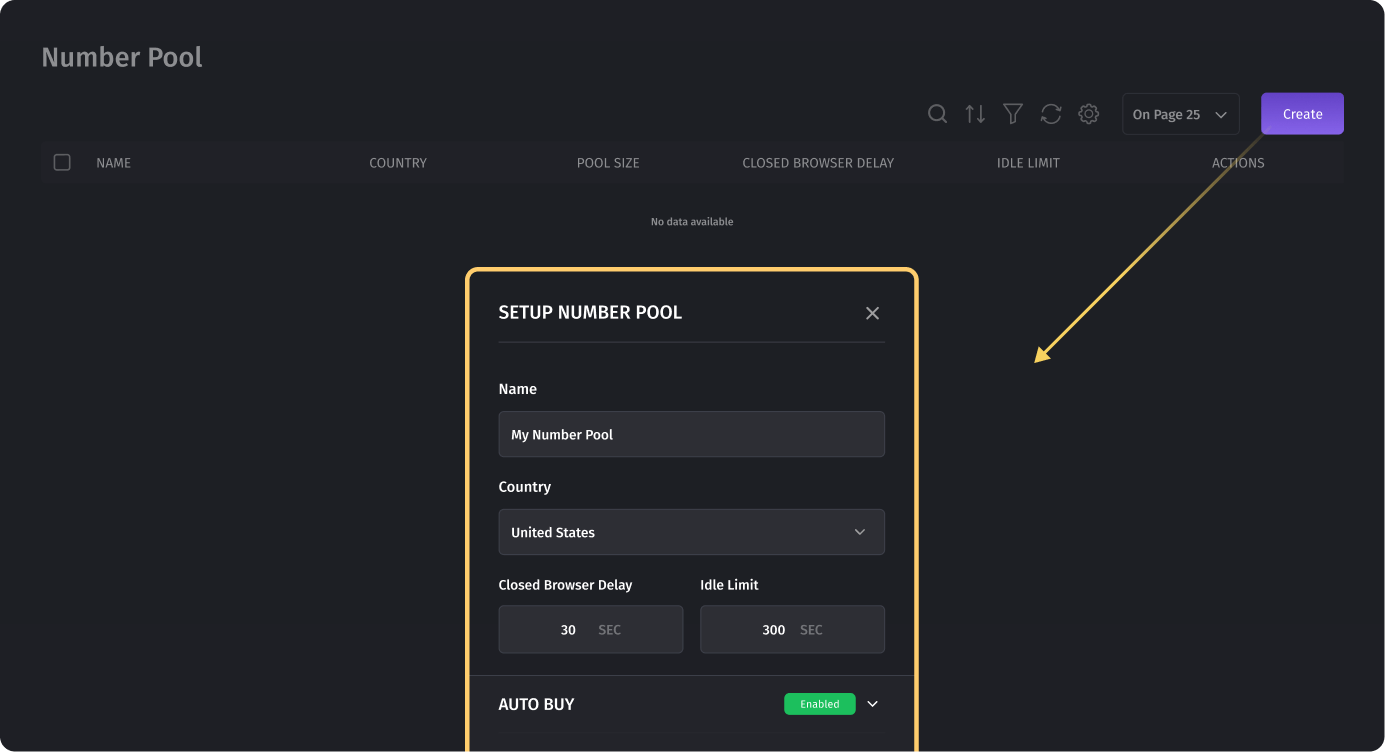
- Assign a range of dynamic numbers or buy new numbers that will be used to track visitors coming through your Google Ads campaigns.
- Configure Number Pool Settings:
- Customize the settings for your number pool, such as how numbers are assigned and the duration they remain associated with a visitor.
Ensure the number pool is linked to the appropriate campaign in Dialics for accurate tracking.
Step 2: Install the Dialics JavaScript/PHP Snippet on Your Landing Page
- Add the JavaScript or PHP Snippet:
- To enable visitor-level tracking, you need to install the Dialics JavaScript/PHP snippet on your website or landing page.
The snippet dynamically assigns the tracking numbers to visitors and captures the Google Click ID (gclid).
- Verify Installation: After installing the snippet, verify that it is functioning correctly by testing a few clicks and ensuring that the correct tracking numbers are being displayed.
Step 3: Integrate Google Ads with Dialics
- Integrate Your Accounts:
- In Dialics, navigate to "Traffic Sources" and select "Google Ads."
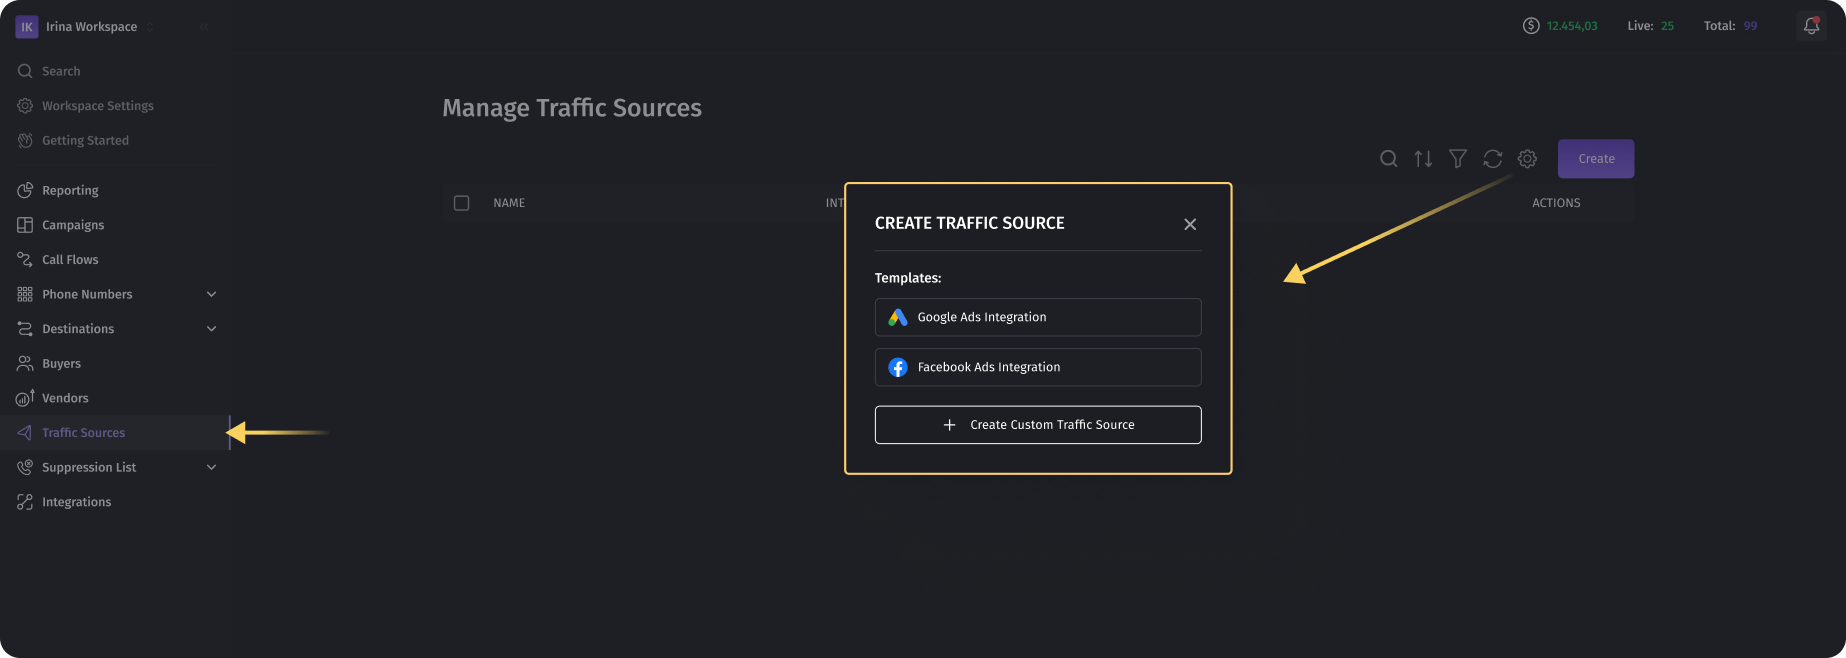
- Click on "Sign in with Google" to link your Google Ads account with Dialics.
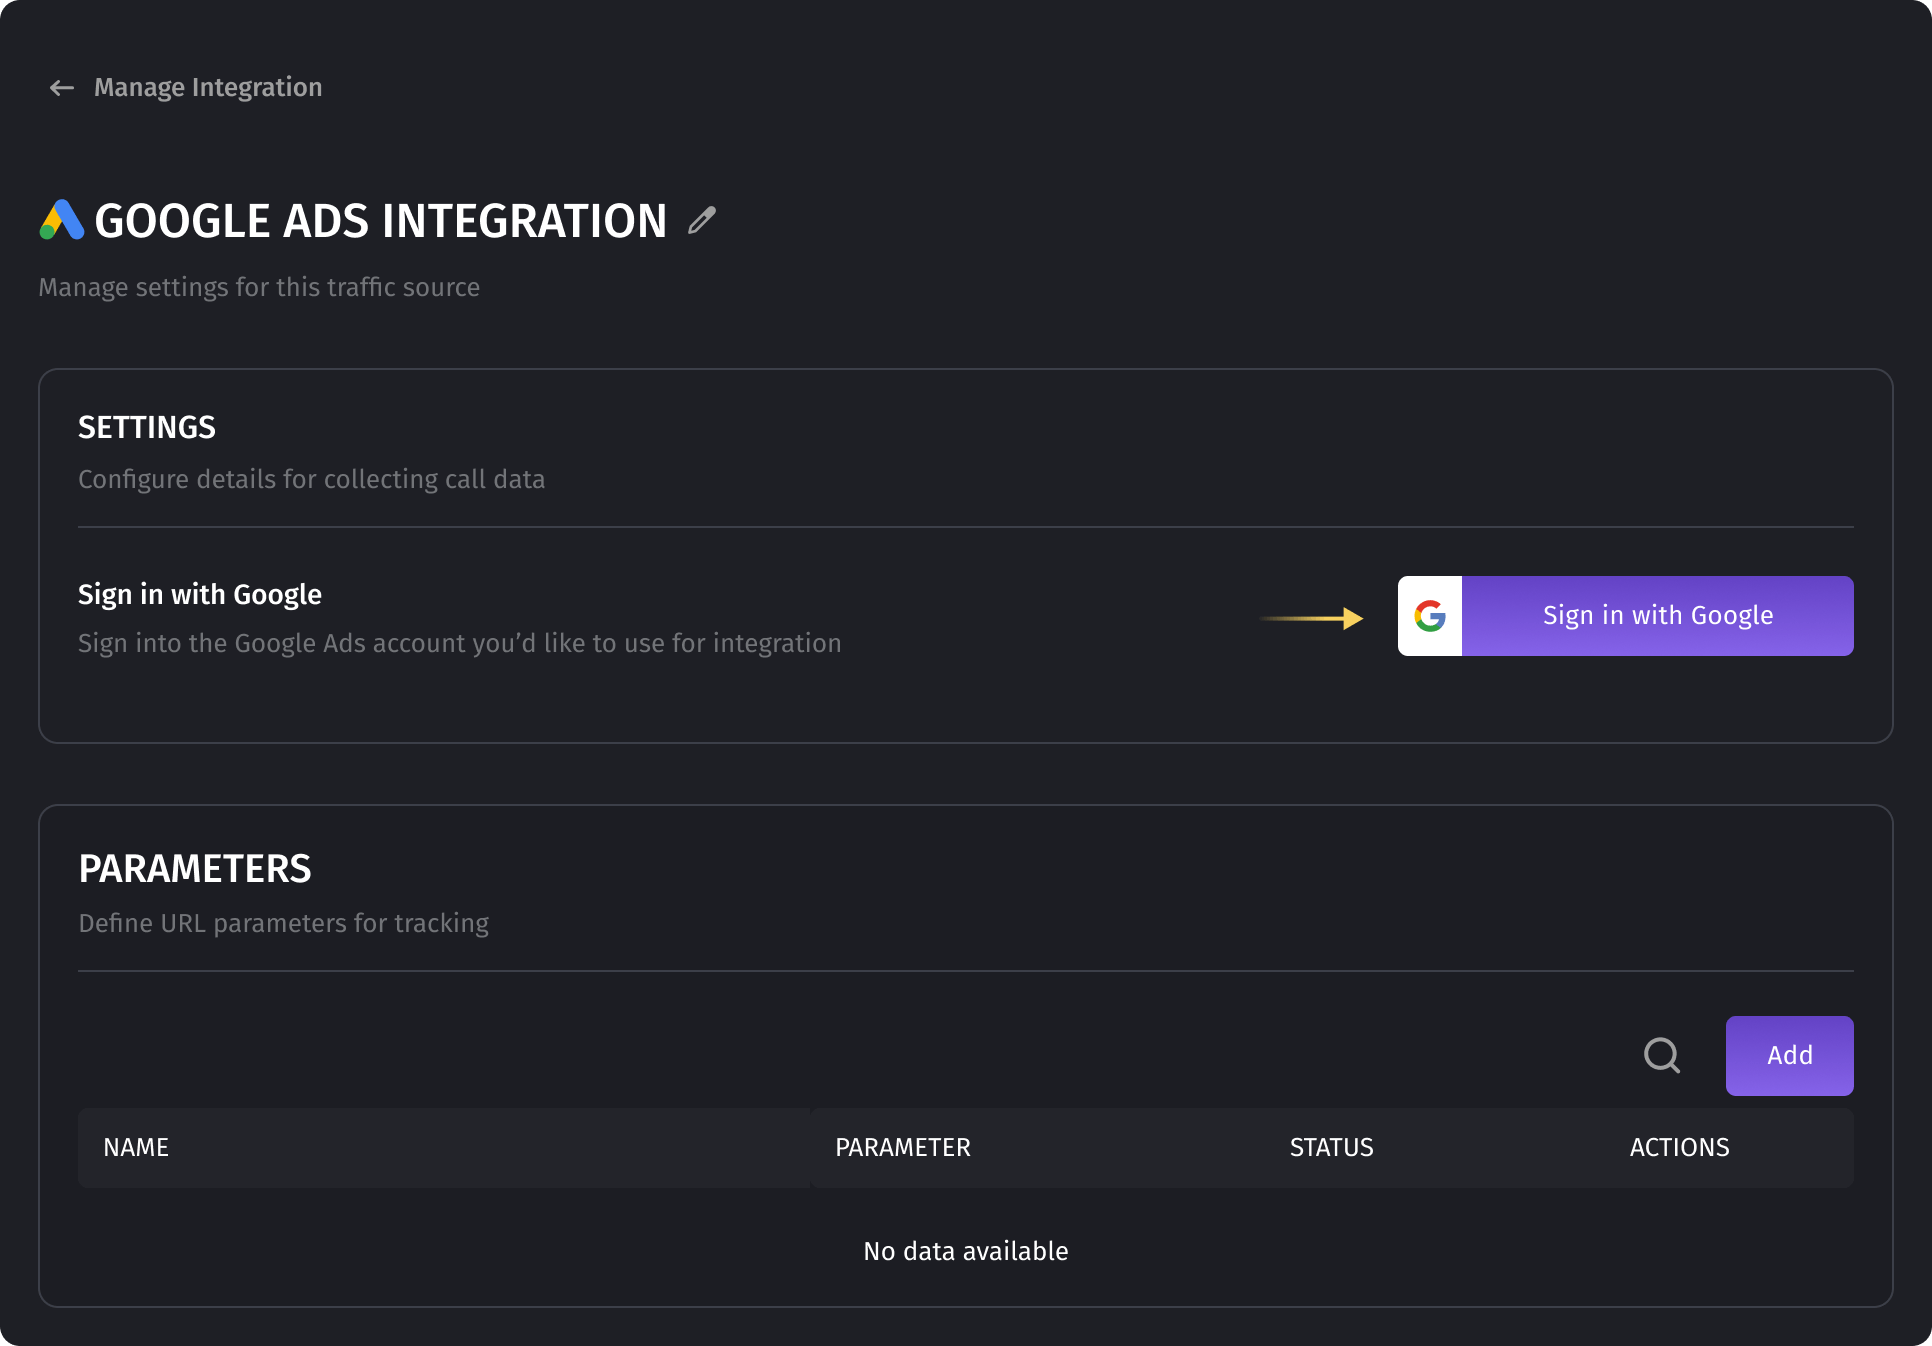
- Follow the on-screen instructions to complete the integration.
- In Dialics, navigate to "Traffic Sources" and select "Google Ads."
Step 4: Set Up Click Conversion Tracking
- Create or Select a Conversion in Dialics:
- After integrating Google Ads, you can either use an existing conversion or create a new one specific to visitor-level tracking.
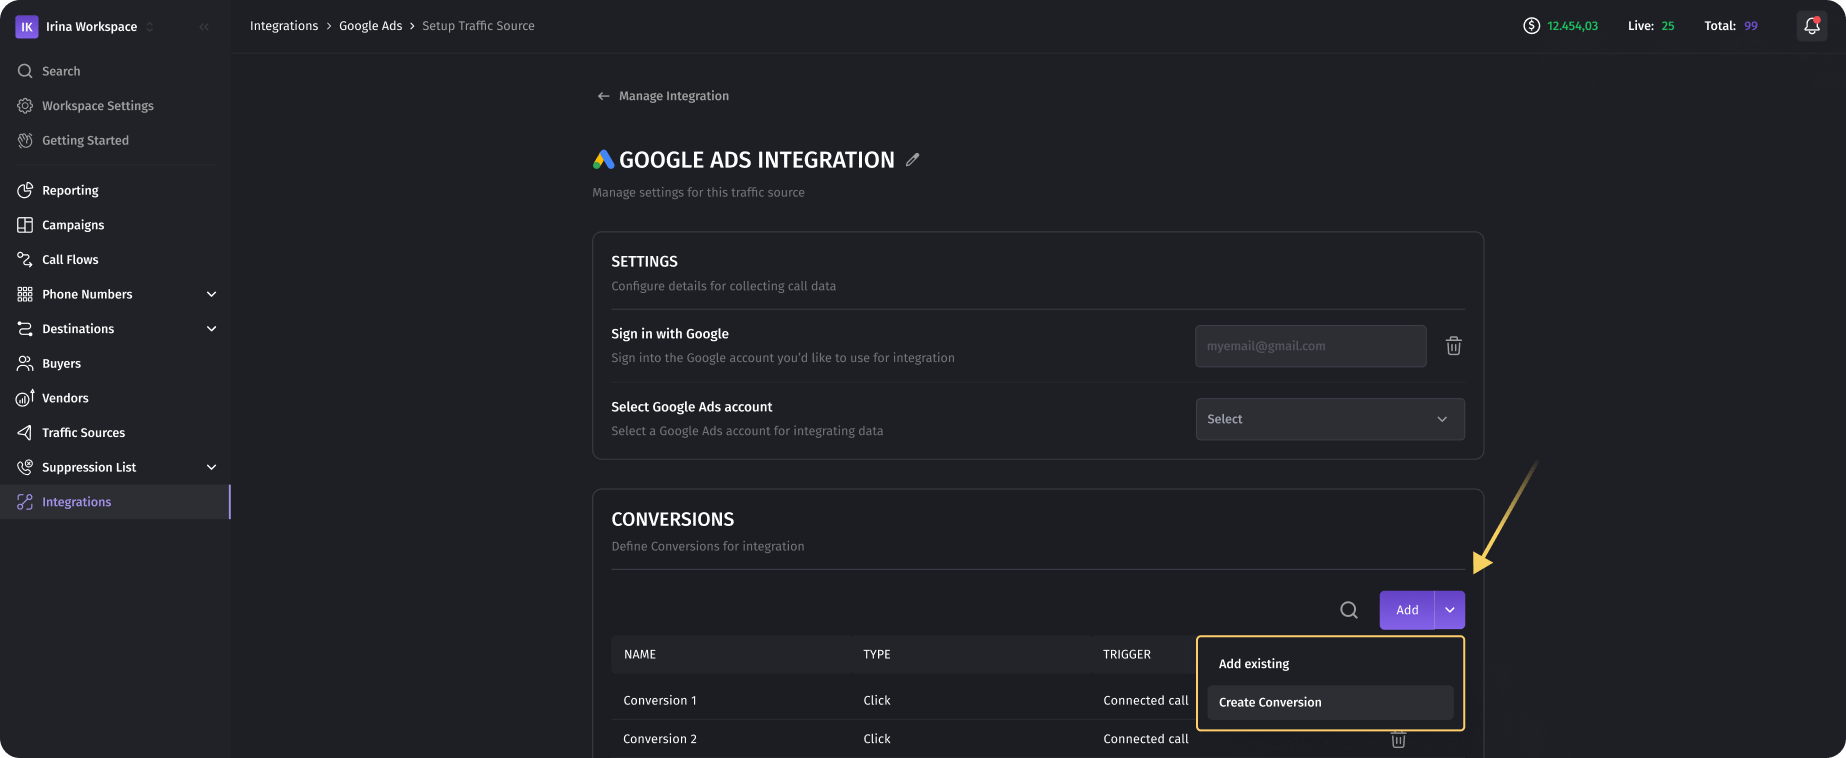
- Existing Conversion: If a suitable conversion is already set up in Google Ads, select it from the list within Dialics.
- New Conversion: To create a new conversion, select "Create New Conversion" within Dialics.
- After integrating Google Ads, you can either use an existing conversion or create a new one specific to visitor-level tracking.
- Select "Clicks" as the Conversion Type:
- Since you are tracking visitors who interact with your website or landing page after clicking on your Google Ads, select "Clicks" as the conversion type.
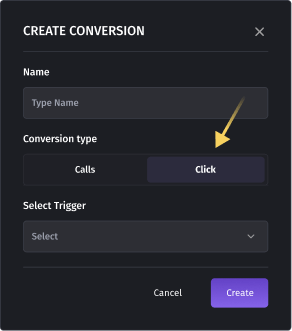
This setup ensures that every time a visitor clicks through your ad and makes a call, it is tracked as a conversion.
- Since you are tracking visitors who interact with your website or landing page after clicking on your Google Ads, select "Clicks" as the conversion type.
- Configure Conversion Triggers:
- Converted Calls: Set up the trigger to log a conversion when a call results in a successful outcome, such as a sale or a qualified lead.
- Connected Calls: Log a conversion when the call is successfully connected.
- Incoming Calls: Choose this trigger to log a conversion as soon as an incoming call is received, regardless of the outcome.
Step 5: Adding Tracking Templates to Google Ads
- In Google Ads, go to the campaign, ad group, or individual ad where you want to apply the tracking template.
- Navigate to the "Tracking Template" field. This can be found under the "Settings" tab for campaigns and ad groups, or in the ad creation/editing panel for individual ads.
- Enter your custom tracking template: Ensure it includes the parameters you wish to track:
gclid=[gclid]&campaignid=[campaignid]&adgroupid=[adgroupid]&creative=[creative]&matchtype=[matchtype]&network=[network]&device=[device]&keyword=[keyword] - Save the changes and test to confirm that the parameters are correctly appended to the URLs when your ads are clicked.
Step 6: Assign the Traffic Source and Conversion to a Tracking Number
- Assign the Traffic Source:
- In Dialics, navigate to your campaign settings and assign the Google Ads traffic source to the tracking number with the number pool.
This ensures that all visitors who arrive through your ads are tracked with the dynamic numbers in the pool.
- Link the Conversion:
- Ensure that the conversion you set up in Step 3 is linked to the tracking numbers within your Dialics campaign.
Step 7: Monitor and Optimize Your Campaigns
- View Conversion Data in Google Ads:
- Once everything is set up, monitor the conversion data in your Google Ads account to see which clicks are leading to phone calls.
- This data will automatically sync from Dialics, allowing you to analyze the performance of specific ads, keywords, and campaigns.
- Optimize Campaigns Based on Performance:
- Use the detailed visitor-level tracking data to refine your Google Ads strategy.
- Focus on optimizing the ads and keywords that drive the most valuable calls, and consider adjusting bids or targeting to maximize ROI.
Table of contents
- Overview:
- Step 1: Set Up Your Number Pool in Dialics
- Step 2: Install the Dialics JavaScript/PHP Snippet on Your Landing Page
- Step 3: Integrate Google Ads with Dialics
- Step 4: Set Up Click Conversion Tracking
- Step 5: Adding Tracking Templates to Google Ads
- Step 6: Assign the Traffic Source and Conversion to a Tracking Number
- Step 7: Monitor and Optimize Your Campaigns
Was this article helpful?