- Help Center
- Account Settings
- White Label
White Label
Dialics White Label allows other companies, marketing affiliates, or advertising agencies to rebrand the Dialics call tracking platform and use it as their own product. Such an approach enables businesses to focus on promoting their own brands instead of developing the required software from scratch.
Branding is the process of customizing the appearance and design of the Dialics call tracking platform to match the unique style of your company. It includes altering the typeface, color scheme, logo, and other interface components to create a distinctive corporate identity and establish a recognizable brand image.
Configuring white label includes changing the appearance of the Dialics call tracker and distributing it to users via the custom domain name.
Please note that if you decide to change the visual appearance of the existing white label, you don't have to alter the white label configuration (CNAME records). You can change images and colors on the run, and all visual updates will be applied as soon as you reload the page.

How to set up White label
To locate the White Label settings, follow these steps:
- Click on the user icon at the bottom of the left menu.
- Then click on "Account settings" and select "White label".
This will take you to the White Label settings where you can customize the product according to your brand’s requirements.
Appearance Settings
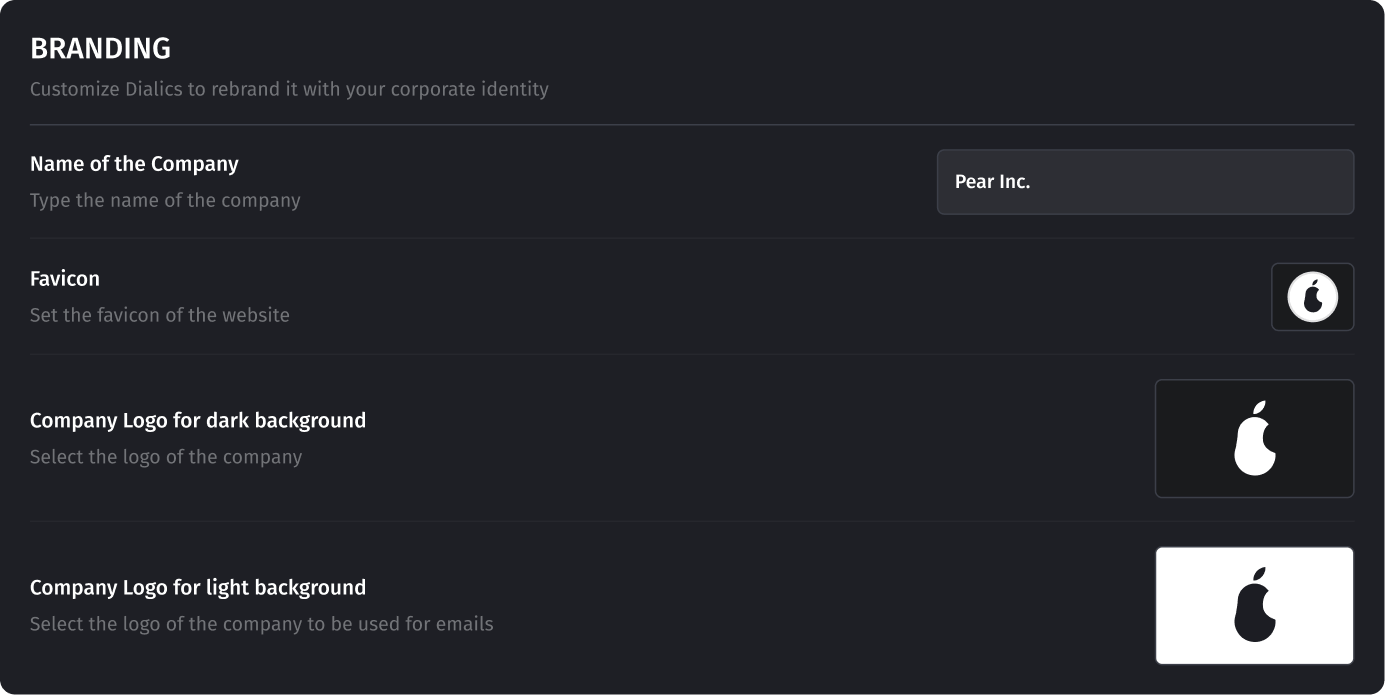
Branding
Type in the name of the company, set the favicon, and set the company logo on the dark and light backgrounds. The logo with the light background will also be used for corporate emails.
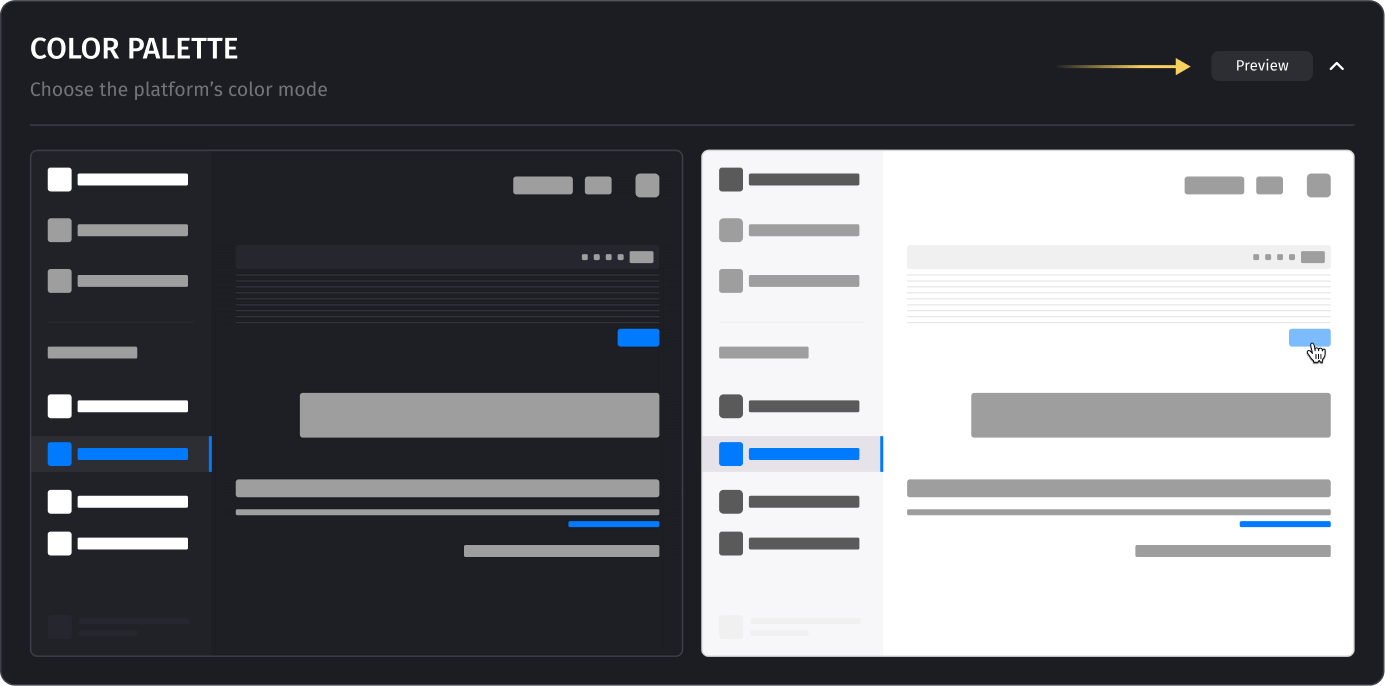
Color Palette
Customize the color mode of the platform. The ‘Preview’ drop-down allows the user to see the modifications for the light and dark themes. The dark theme is on the left side, and the light is on the right.
- Primary: select the color for the buttons and menu tabs.
- Hover: select the color that will indicate the element you put a mouse on. Please move the mouse pointer over any button to view the changes.
- Highlight: select the color of the active element for the light and dark themes.
- Menu Background: select the color of the menu background for the light and dark themes.

Buttons
Adjust the look of the buttons. The ‘Preview’ drop-down allows the user to see the modifications for the light and dark themes. The dark theme is on the left side, and the light is on the right.
- Active Tabs: select the color for the active buttons and tabs in the light and dark themes.
- Background Tabs: select the color for the buttons and tabs that are not currently active. Customize the colors for the dark and light themes.
- Corner Radius: specify the corner radius for the buttons by indicating a value from 0 to 20.

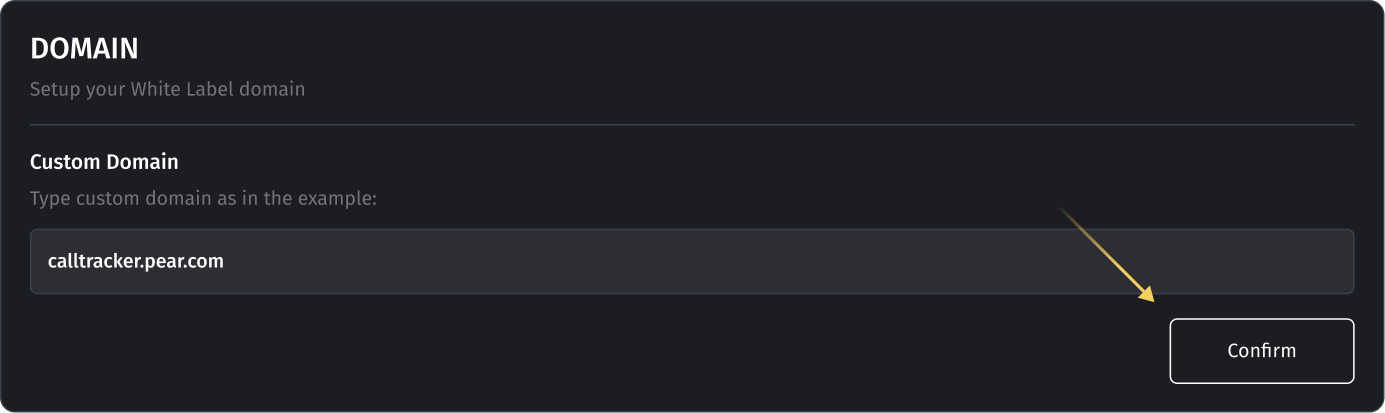
Domain Settings
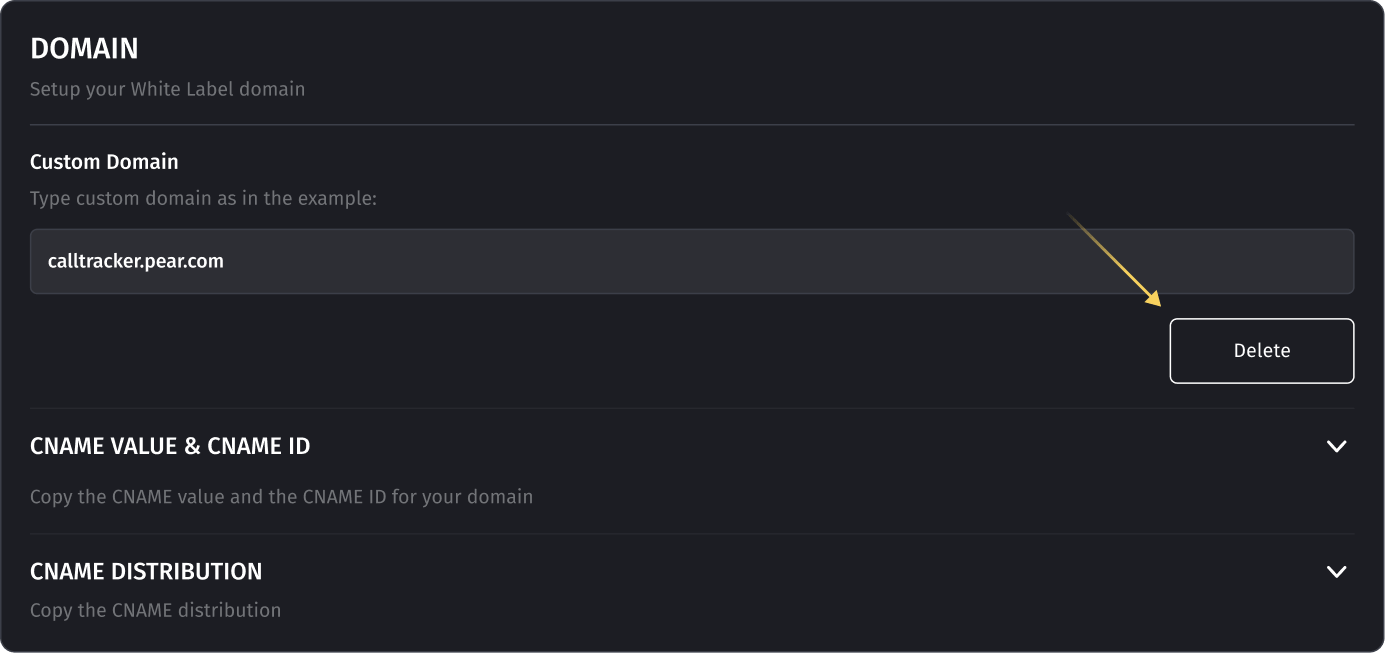
- Type in your subdomain name, e.g., calltracker.company.com Press the ‘Confirm’ button. Please note that you cannot insert your main domain name in the field, e.g., company.com
- Now, your domain ownership should be verified. These values generally appear without any delays, but in some cases, you might need to wait for several minutes.When you request a certificate, the CNAME information might be displayed as it is on the screen below.
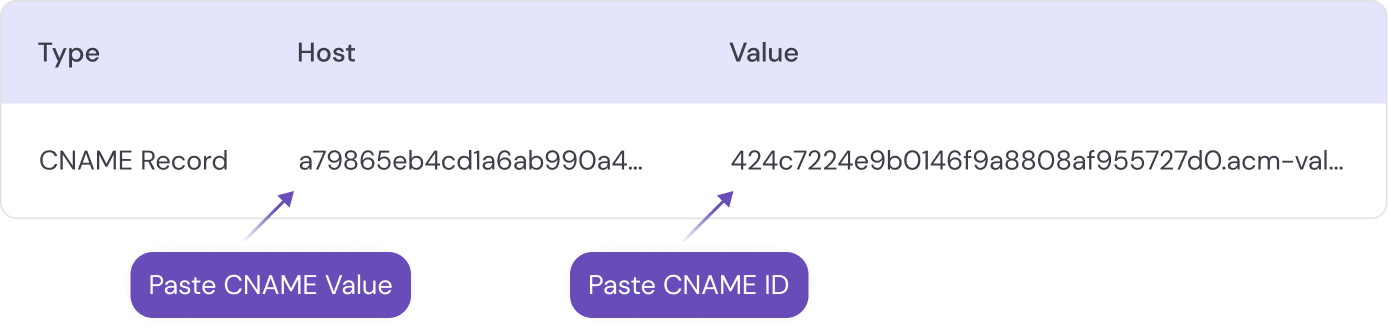 The host field contains the CNAME Value, while the CNAME ID should be taken in full as in the value field.Please note that a valid CNAME Value might differ from the one shown on the screen. Domain service providers are inconsistent in how they interpret host values. In some cases, you are expected to provide the entire string, while in others, you should omit the main domain part because it is added automatically. Try to determine in advance what type of input your provider expects.
 After creating a CNAME record, press the ‘Verify’ button.
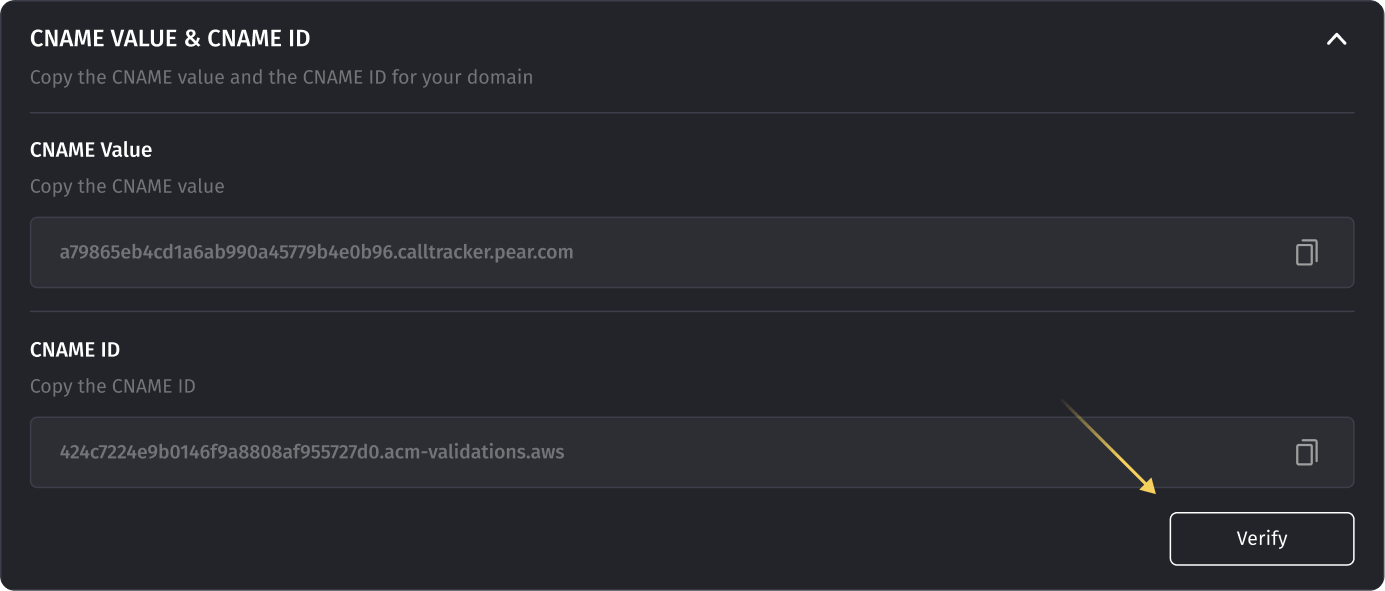 The verification process may take up to 72 hours.
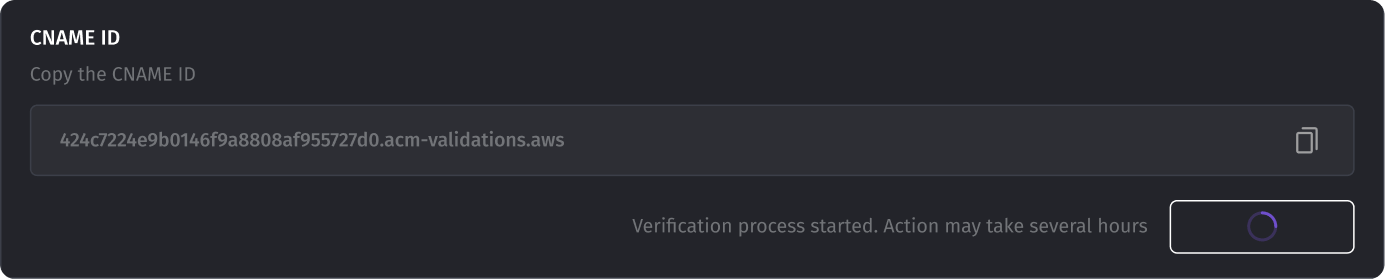 If the verification is passed successfully, the button will change to ‘Ready’ with two green ticks, as shown on the screen below.
 If the verification fails, you will have to start again with your custom domain name (step 1).
- After a successful verification of step 2, you go on with CNAME Distribution.
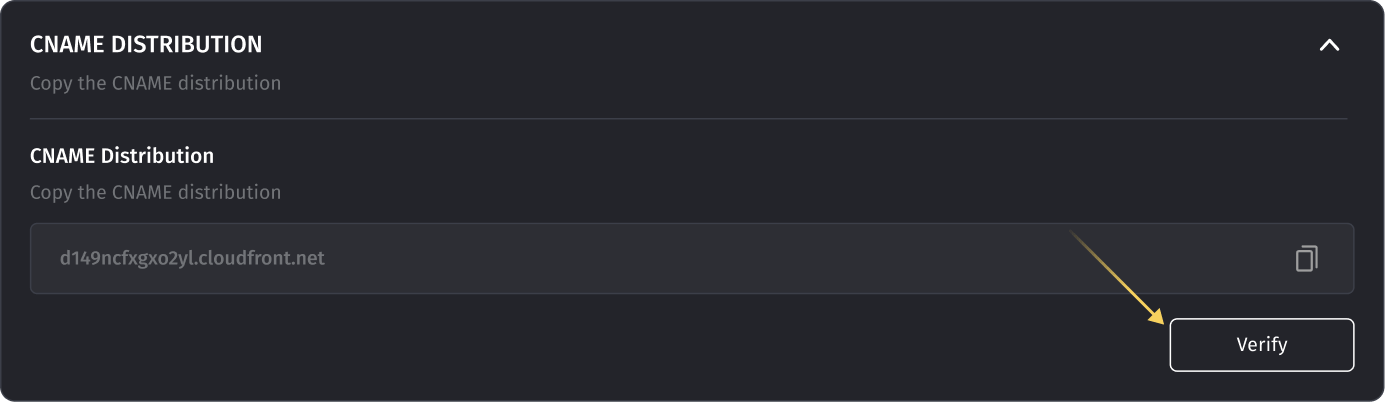 The second record you create should also be a CNAME, where the host field is a custom domain you’ve specified and the value field is the CNAME Distribution you need. Please look at the second line in the table shown below as an example.
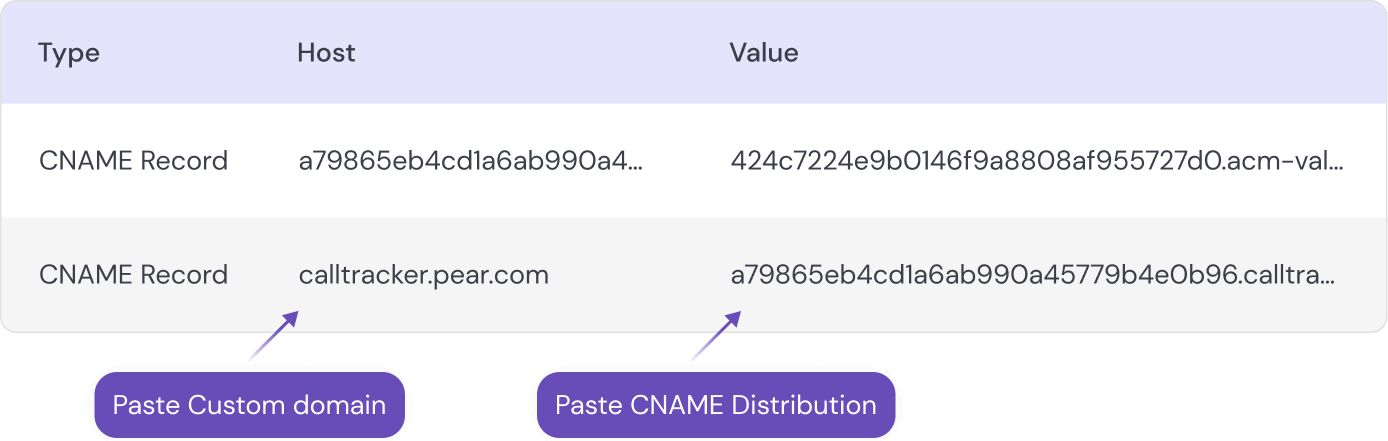 Please note that domain service providers are inconsistent in how they handle host values in CNAME records. The correct host value may be a fully qualified domain name or just a subdomain in case the main part of a domain is added automatically.
 After the second CNAME record is created, press the ‘Verify’ button. The verification process, again, might take several hours.If the verification is passed successfully, the button will change to ‘Ready’ with two green ticks, as shown on the screen below.
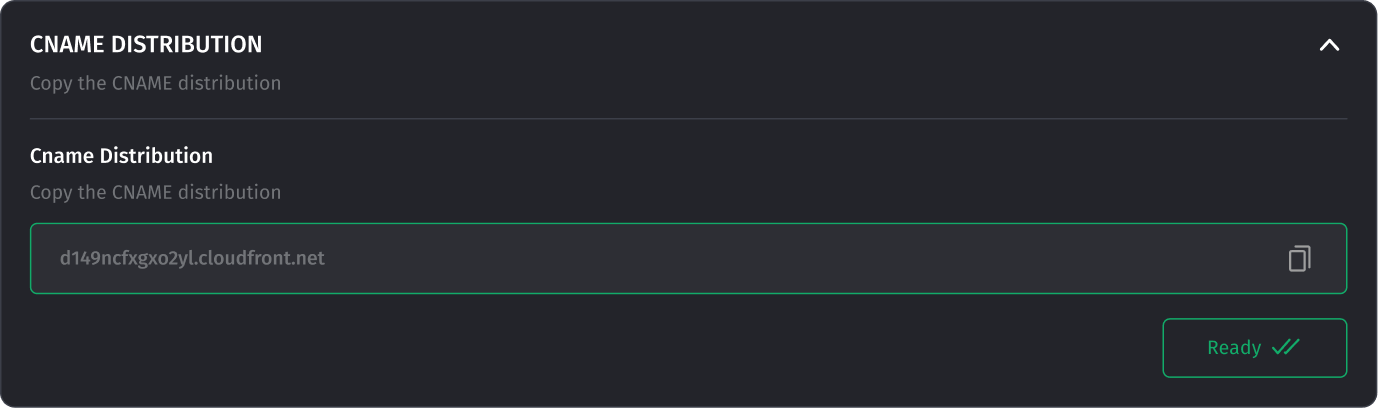 After that, your White Label is fully functional, and you can access it through the domain name you specified.If the verification fails, you will see the notification ‘Unable to verify distribution is deployed’.
Deleting the White Label
To delete a White Label, you need to press the ‘Delete’ button. After pressing `Delete`, make sure you remove the CNAME records you entered in your DNS service provider console. If they remain untouched in DNS records, you wouldn't be able to configure a new white label for the same subdomain.
You may not be able to create a new White Label with the same domain name immediately after removing the previous one because your fully qualified domain name should be released. This process generally takes up to 10 minutes.
We hope the Dialics White Label will bring commercial success to your business strategy. Please contact us with any questions.
Was this article helpful?