Campaign settings: Tracking Numbers section
Updated 18 months ago
Tracking Numbers in Dialics Campaigns
In the Tracking Numbers section of a Dialics campaign, users can add both Static Numbers and Dynamic Numbers (also known as number pools in Dialics), enabling precise tracking of calls and conversions across various marketing channels.
Tracking Numbers are a crucial tool for monitoring customer interactions and gathering valuable data on the effectiveness of marketing campaigns. Each Dialics campaign can have multiple Tracking Numbers, but each specific number or pool can be linked to only one campaign.
Types of Tracking Numbers
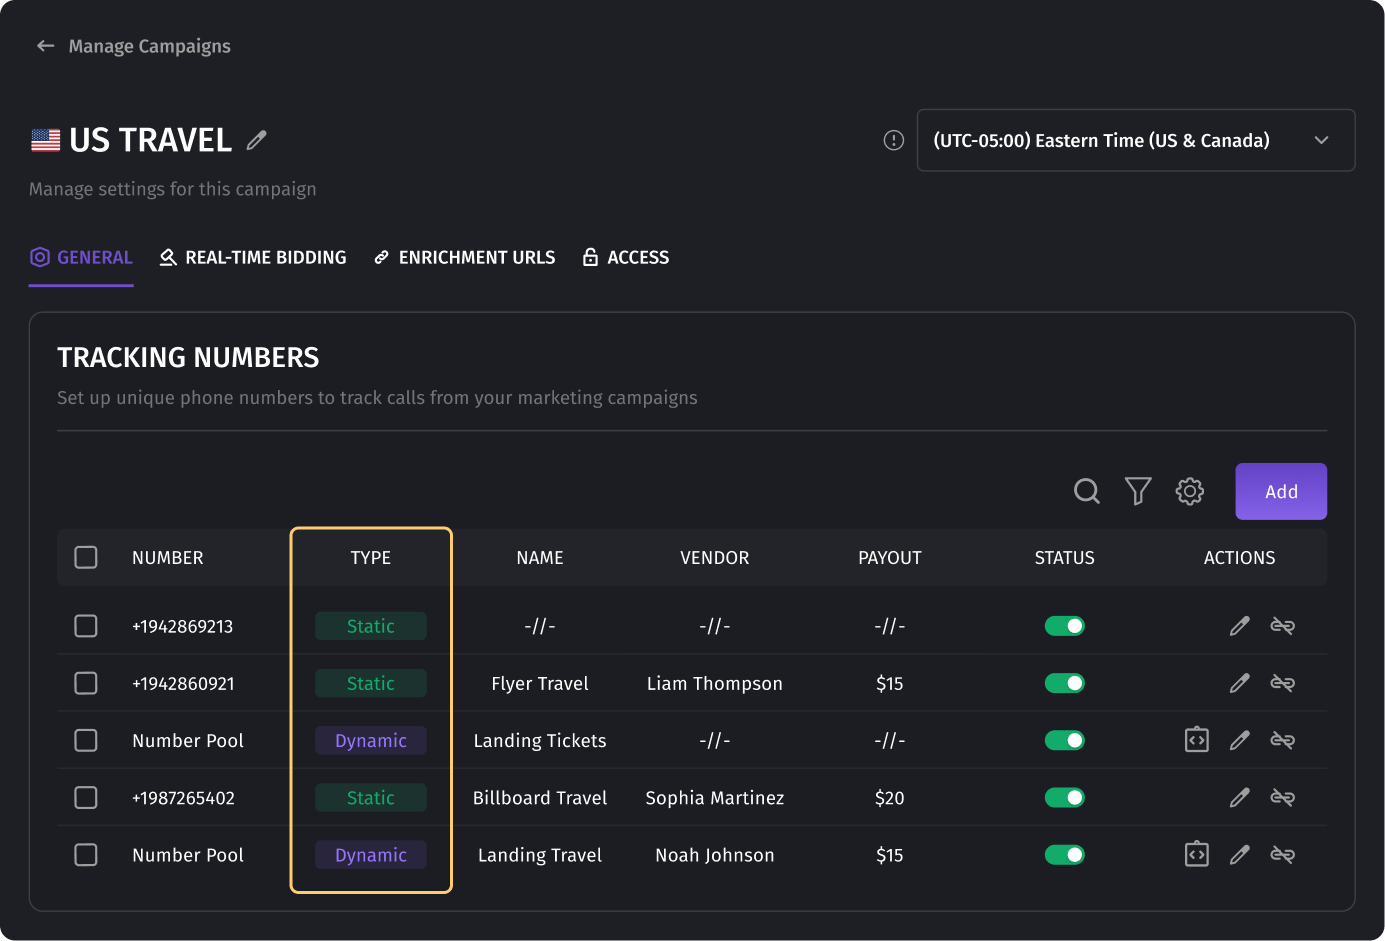
- Static Tracking Numbers: These are individual, fixed phone numbers linked to a specific campaign or marketing source. They do not change and are suitable for scenarios where dynamic tracking is unnecessary.
- Dynamic Tracking Numbers (Number Pools): These are groups of numbers used for Dynamic Number Insertion (DNI) — a process where each visitor or session is assigned a unique number for accurately tracking the source of each call. This method is especially effective for high-traffic campaigns that require detailed visitor behavior analysis.
Adding Tracking Numbers to a Campaign
To add a Tracking Number to a campaign, follow these steps:
- Go to Campaign Settings:
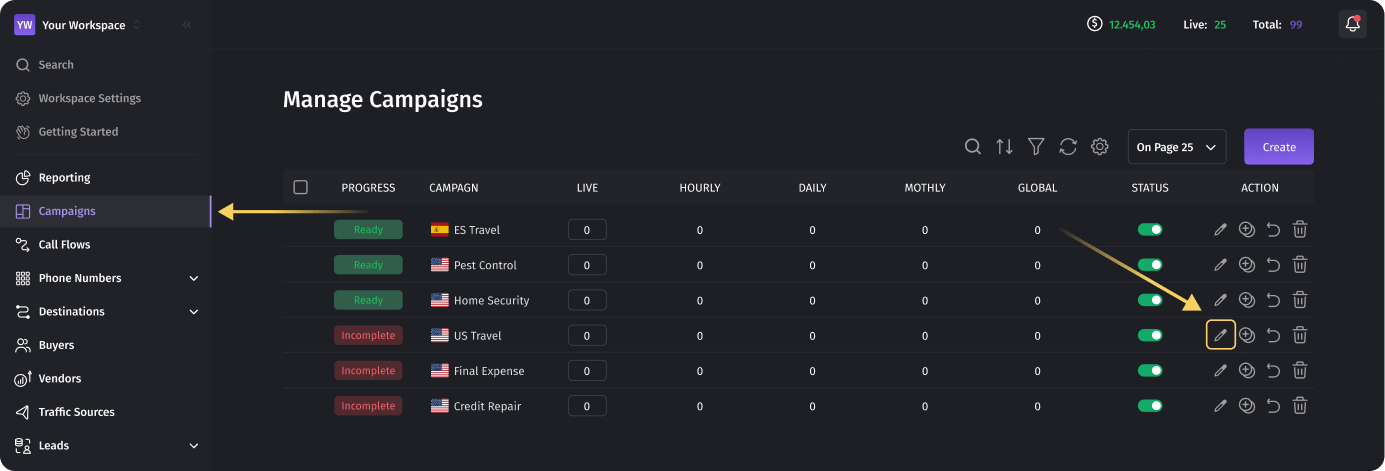
- Navigate to the Campaigns tab in the sidebar menu.
- Select the campaign you want to edit by clicking the pencil icon. The GENERAL tab of the campaign will open.
- Access the Tracking Numbers Section:
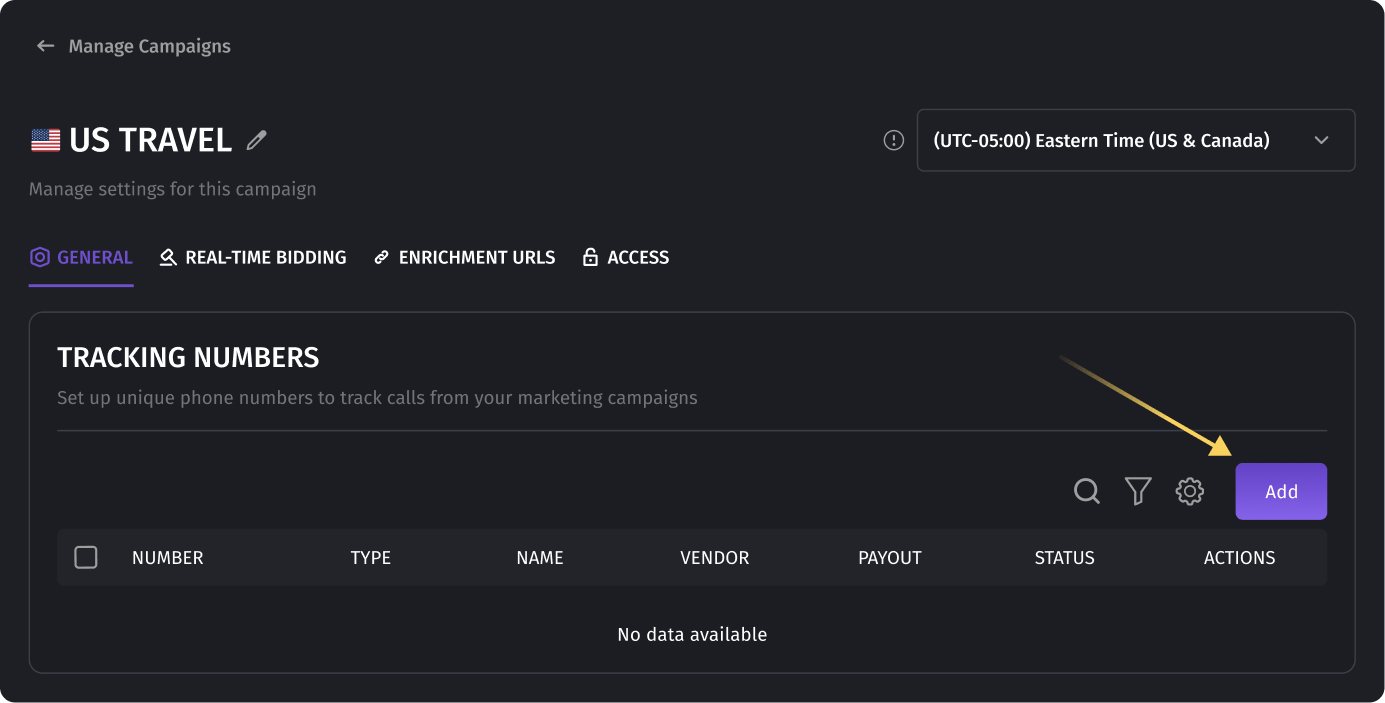
- In the Tracking Numbers section, click the Add button.
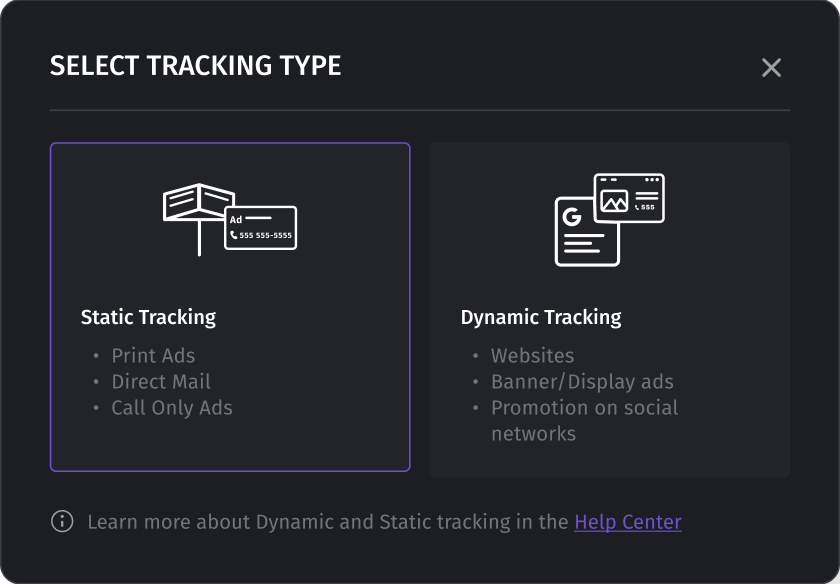
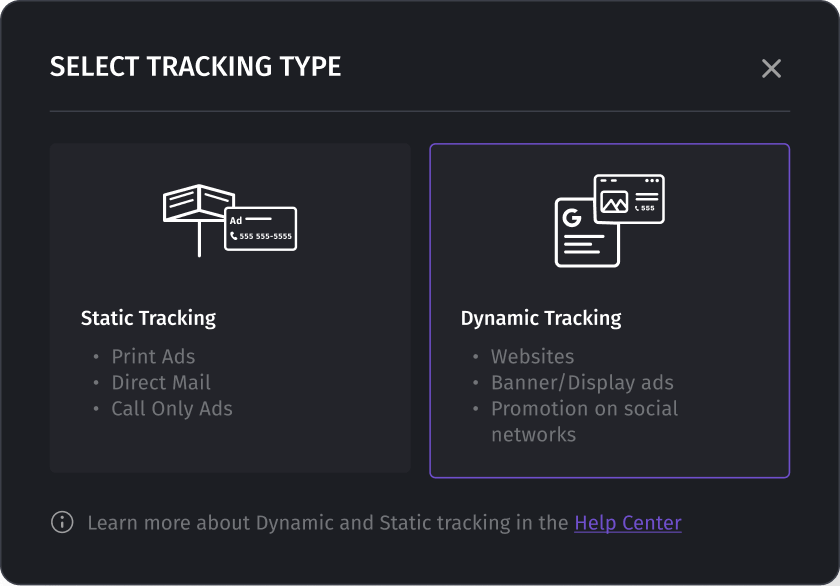
- A popup window with two options will appear: Static Tracking and Dynamic Tracking.
- In the Tracking Numbers section, click the Add button.
Adding Static Numbers
- Select Static Tracking:
- Choose Static Tracking in the SELECT TRACKING TYPE popup.
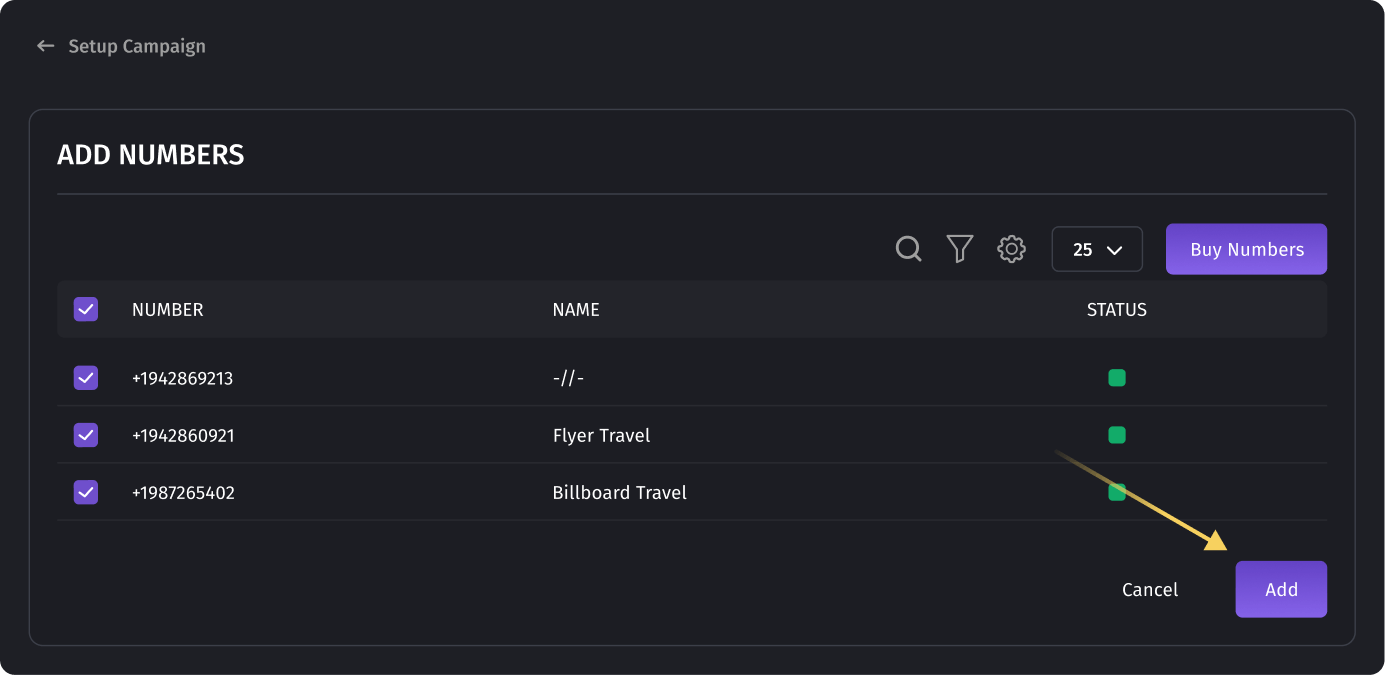
- The ADD NUMBERS page will appear, displaying available static numbers.
- Choose Static Tracking in the SELECT TRACKING TYPE popup.
- Select or Purchase Static Numbers:
- To add existing static numbers: Select the desired numbers by checking the boxes next to them and click Add.
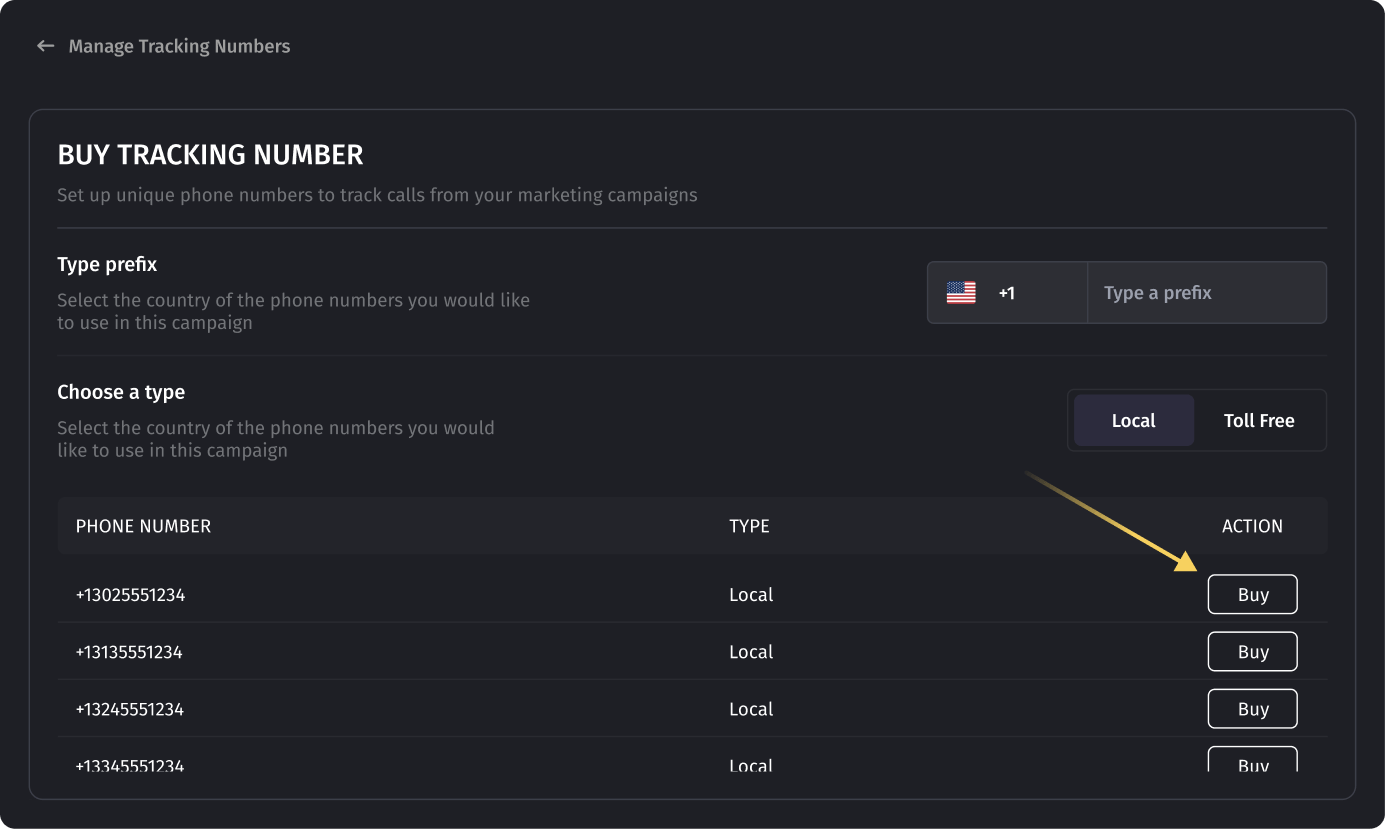
- To purchase new static numbers: Click Buy Numbers in the upper right corner. Select the number, click Buy, and confirm your purchase. You can also proceed to set up the Tracking Number after purchase for further configuration.
- To add existing static numbers: Select the desired numbers by checking the boxes next to them and click Add.
- Configure Static Number Settings:
- After adding the static number, you can adjust its settings by clicking the pencil icon next to it. Available settings include Vendor, Traffic Source, and Advanced Settings.
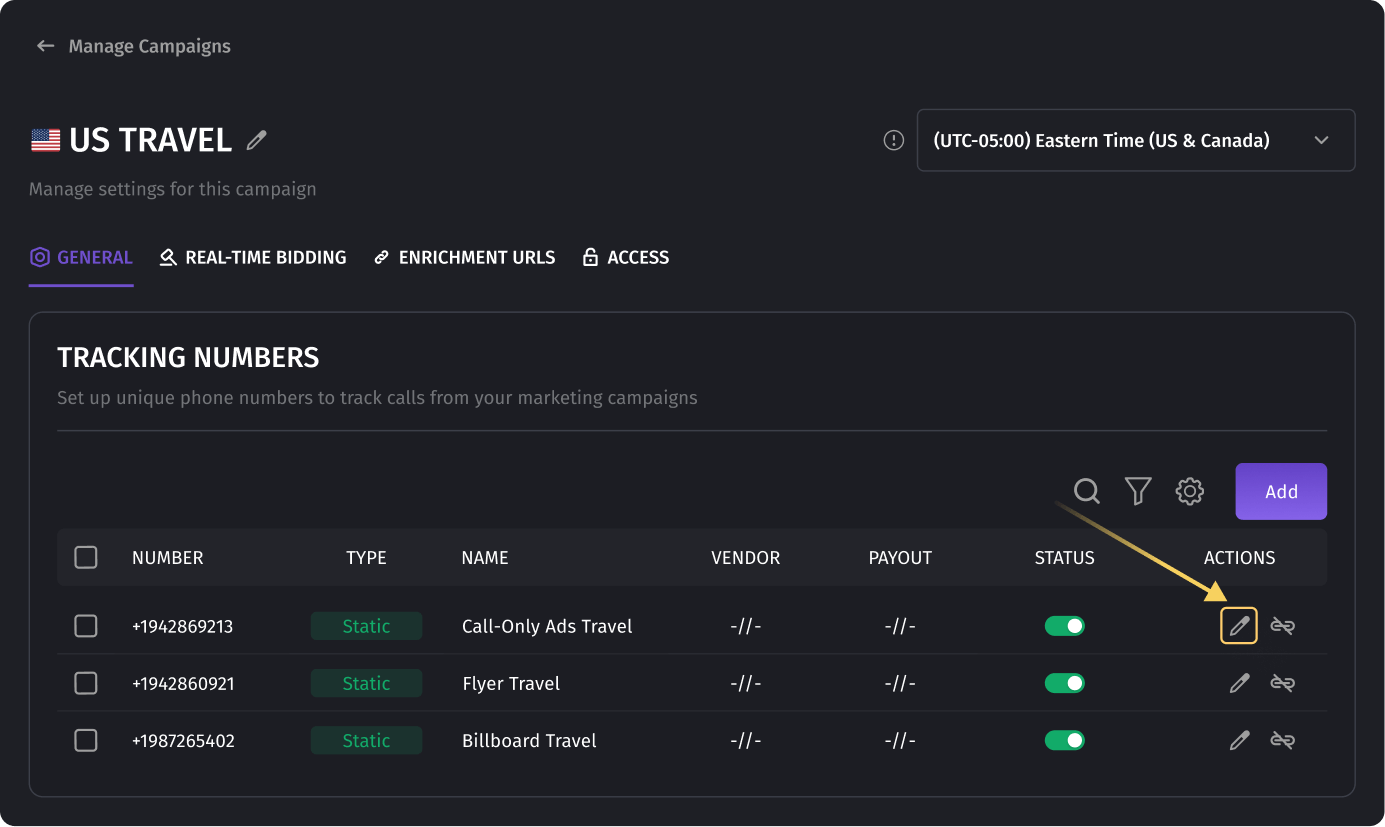 For more detailed information on configuring static numbers, please refer to the following link: Static Number Configuration
- After adding the static number, you can adjust its settings by clicking the pencil icon next to it. Available settings include Vendor, Traffic Source, and Advanced Settings.
Adding Dynamic Numbers (Number Pools)
- Select Dynamic Tracking:
- Choose Dynamic Tracking in the SELECT TRACKING TYPE popup.
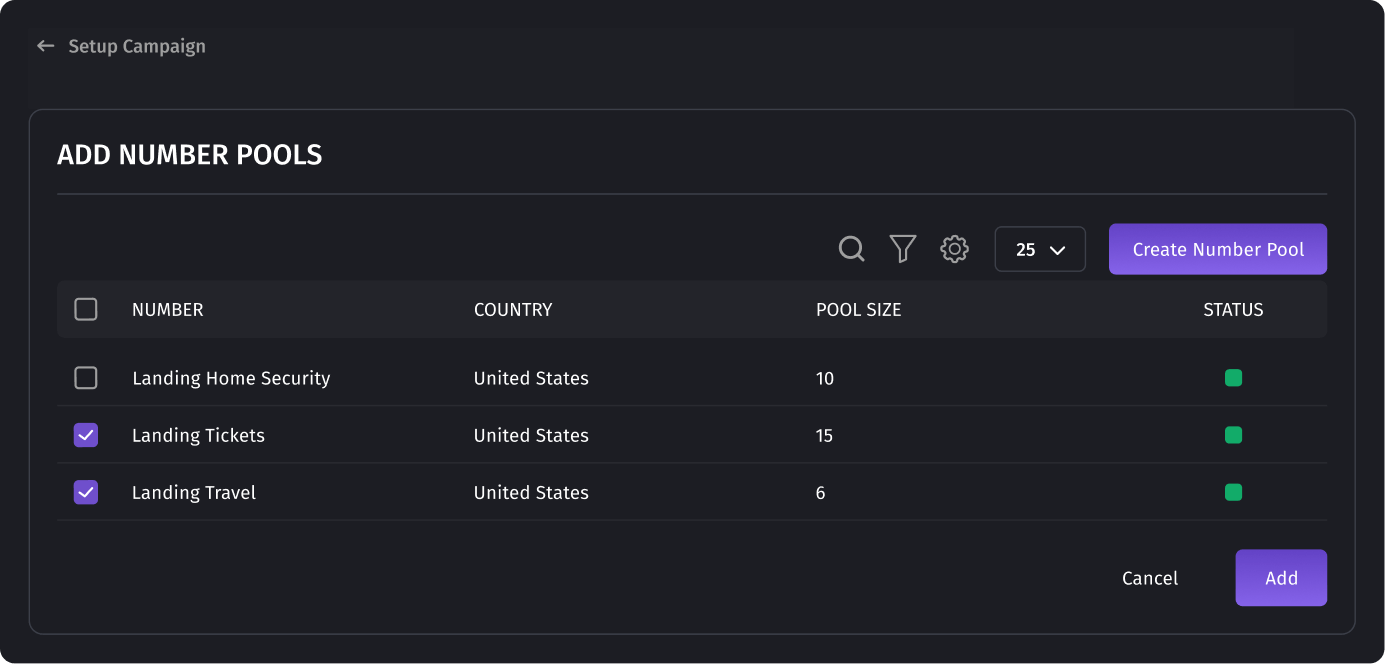
- The ADD NUMBER POOLS page will appear, displaying available number pools.
- Choose Dynamic Tracking in the SELECT TRACKING TYPE popup.
- Select or Create a New Number Pool:
- To add an existing number pool: Select the desired pool by checking the box next to it and click Add.
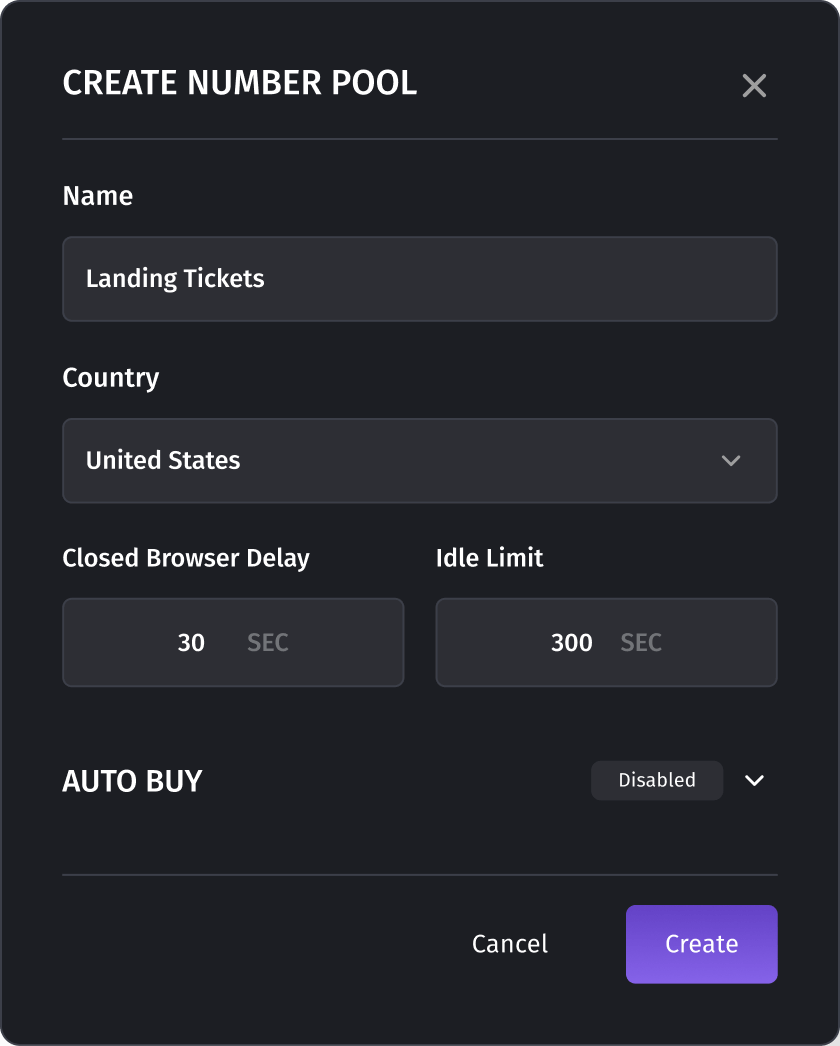
- To create a new number pool: Click the Create Number Pool button. In the creation form, specify the Name, Country, Closed Browser Delay, Idle Time, and Auto Buy options. After creation, the new pool will appear at the top of the list, allowing you to add it to the campaign.
- To add an existing number pool: Select the desired pool by checking the box next to it and click Add.
- Configure Number Pool Settings:
- After adding the number pool, click the pencil icon next to it in the Tracking Numbers section to access settings.
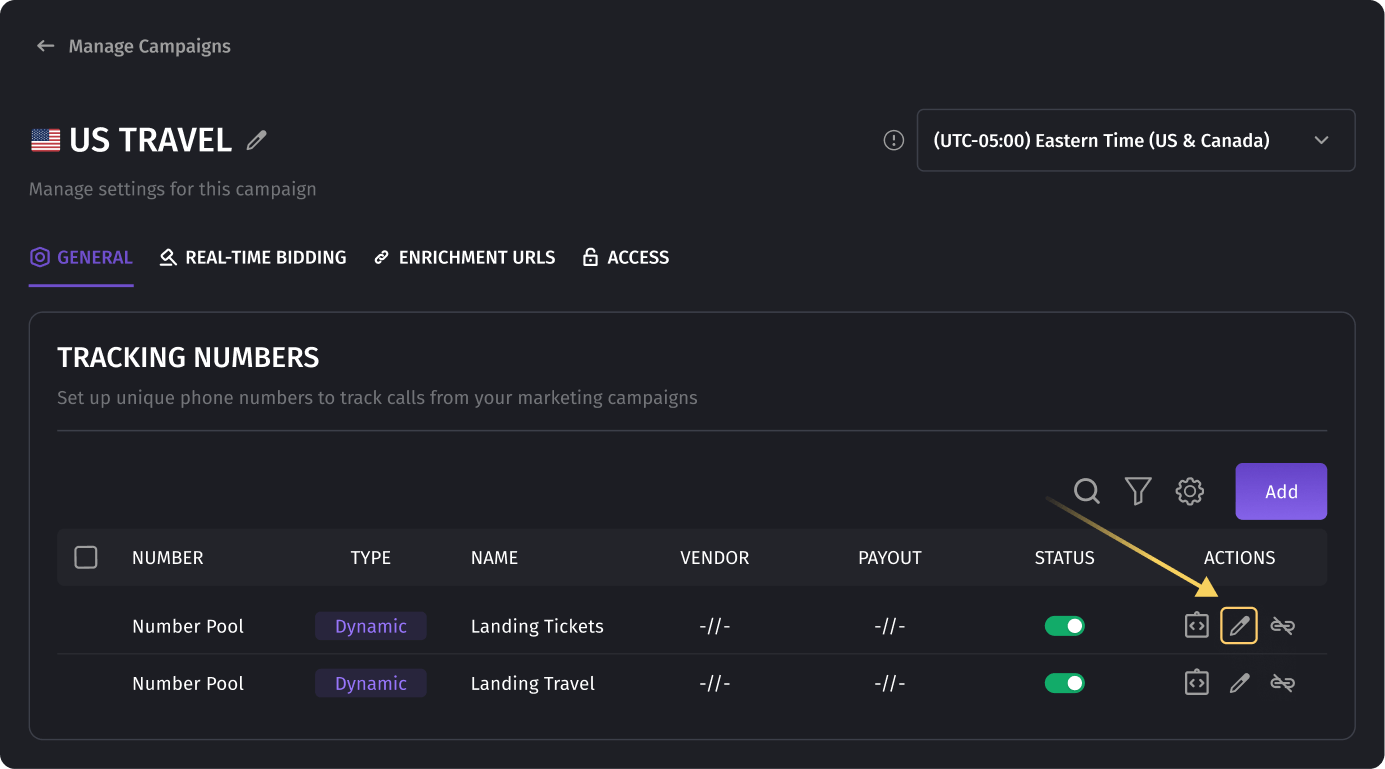
- After adding the number pool, click the pencil icon next to it in the Tracking Numbers section to access settings.
You can find more information about dynamic numbers here.
Setting Conversion Parameters for Vendors
For setting up conversion options for vendors on both static and dynamic numbers:
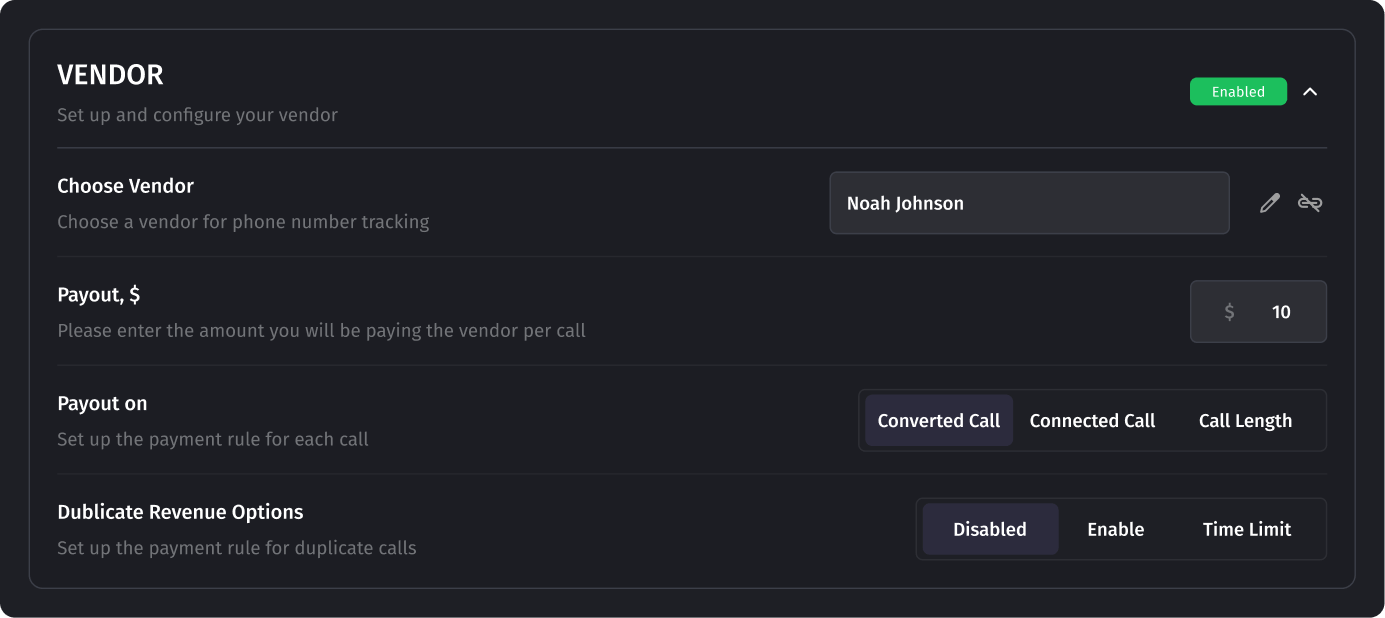
- Configure the Vendor and Conversion Parameters:
- Payout: The amount to be paid to the vendor upon conversion.
- Payout on: The event at which the call is considered converted for the vendor and subject to payment.
- Converted Call: The vendor receives the payout only if the call is converted, meeting the conversion conditions set for the destination.
- Call Connected: The vendor receives the payout if a connection was established with the destination, regardless of call duration (even a 1-second call is sufficient).
- Call Length: You can set a minimum call duration for the call to be considered converted for the vendor, and the vendor will receive the payout.
- Duplicate Revenue Options: Handling duplicate calls. This setting affects vendor payouts in the case of repeated calls from the same Caller ID.
- Disabled: All duplicate calls are not converted, regardless of the Payout on option.
- Enabled: All duplicate calls are converted if the condition in the Payout on option is met.
- Time Limit: The number of days after which a Caller ID is no longer considered a duplicate.
Was this article helpful?